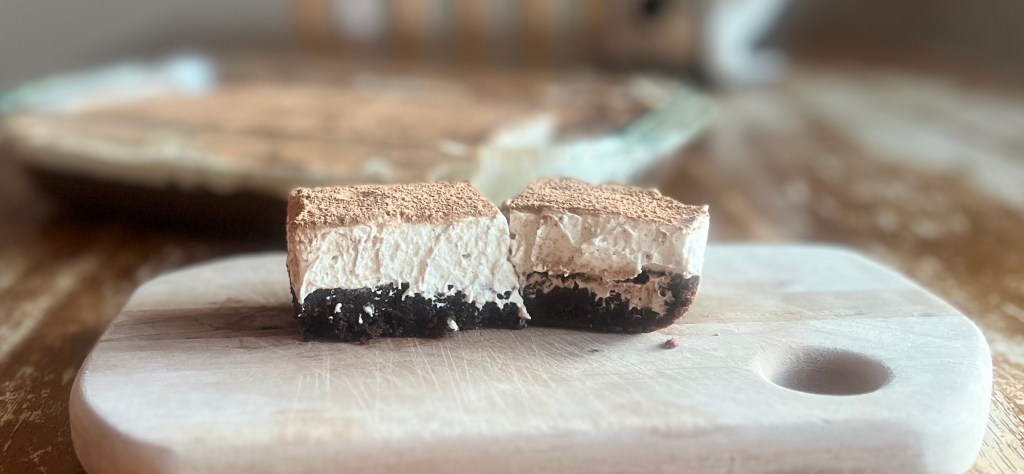
These brownies are an ode to one of my favorite desserts, tiramisu. Tiramisu has become somewhat of a viral flavor on social media lately, so I decided to create my take on the tiramisu brownie that I’ve seen all over TikTok. The base brownie layer is thin and fudgy, and great on their own. However, they’re even better topped with a mascarpone whipped cream topping loaded with vanilla and espresso. The slightly stabilized whipped cream layer allows these bars to keep their shape while still delivering that classic tiramisu look. A perfect blend of airy and rich, these brownies are great for sharing with others or savoring alone.
I adapted Handle the Heat’s Best Ever Chewy Brownies by omitting the chocolate chips and adding instant espresso powder. This substitution allows the brownies to keep an intense chocolate flavor while maintaining a consistently soft texture like tiramisu. When melting the butter and sugar, I changed the microwave time from 60 to 40 seconds. This way you can skip the step of waiting for the butter and sugar to cool before adding in the eggs and vanilla, but still achieve a crackly crust.
Brownie Tips
Many people use brownie mix not only due to simplicity, but also for that crackly crust on top and fudgy yet chewy texture. Fear not! I have searched high and low for tips on how to achieve that perfect texture at home. I have found four tips/ingredients that make homemade brownies even better than the boxed stuff.
- Cornstarch– Cornstarch helps to provide that quintessential crackly crust that we all know and love.
- Espresso Powder– Espresso is not only used in this recipe for the tiramisu flavor, but also to enhance the chocolate flavor of these brownies. Since they don’t have any added chocolate other than cocoa powder, the espresso helps to add a richness to these brownies without any added effort.
- Melted Butter and Sugar– Melting the butter and sugar together also helps to add a shiny crust. My tip here is to just heat the ingredients until the butter is almost fully melted. This way, you can add in your eggs almost immediately.
- No Leavening– I have found that using either baking powder or baking soda created too much of a cakey texture for my preference. In this recipe, replacing with cornstarch helps to give a bit of chew and the crackly crust.
Tiramisu Brownies
Recipe by
Servings
16 servings
Prep time
20 min
Cook time
30 min
These bars make a delicious dessert option whether you’re hosting a get together, having Sunday dinner, or enjoying a date-night in. You can prepare the cream in advance and store covered in the refrigerator for up to a day. However, I prefer them after the bars have been assembled and sitting in the fridge overnight. Feel free to add more or less espresso powder, according to your preference, as this recipe is written for those who enjoy a stronger coffee flavor. Garnish with as much cocoa powder as your heart desires. Enjoy!
Brownie Layer
- 5 Tbsp unsalted butter
- 1 1/4 Cup granulated sugar
- 2 large eggs and 1 yolk, cold
- 1 tsp vanilla
- 1/3 Cup vegetable oil
- 2 tsp instant espresso powder
- 3/4 Cup cocoa powder
- 1/2 Cup flour
- 1 Tbsp cornstarch
- 1/4 tsp salt
Topping
- 8 oz mascarpone cheese, room temperature
- 1 Cup heavy cream, cold
- 1/4 Cup powdered sugar
- 1 Tbsp instant espresso powder*
- 2 tsp vanilla bean
- cocoa powder, to taste
Directions
- Preheat Oven: Preheat your oven to 325 degrees. Line a 8 x 8 in or a 2.2 quart metal baking dish with parchment paper. Grease.
- Melt butter and sugar: Place unsalted butter and granulated sugar into a microwave-safe bowl. Microwave on HIGH for about 40 seconds, just until almost all the butter has melted. Stir to melt the remaining butter.
- Combine Wet Ingredients: Pour butter and sugar mixture into a large bowl. Whisk in the eggs, yolk, and vanilla. Add in the vegetable oil and espresso powder, and sift in the cocoa powder. Whisk until no streaks of cocoa remain.
- Add Dry Ingredients: Add the flour, cornstarch, and salt to wet ingredients. Stir just until no streaks of flour remain, scraping down the sides of the bowl often.
- Bake: Pour batter into baking dish. Bake for 25-30 minutes. You’ll know the brownies are done when they are slightly puffed in the center and pulling off the edges. When a toothpick is placed into the center of the pan, tight crumbs should still be attached. Do not overbake. Allow brownies to cool fully before adding the topping.
- Remove Brownies (Optional):If desired, you may use the parchment paper to pull the brownies out of the pan. However, I find that it helps to keep them inside of the pan ensure the mascarpone layer keeps its shape and stays more even.
- Topping: While the brownies cool, set out the mascarpone cheese to reach room temperature. Once room temperature, whip the mascarpone cheese with the heavy whipping cream until soft peaks form. Add in the powdered sugar, vanilla, and 1 tsp of instant espresso powder. Beat on low until blended, and the cream has slightly stiffer peaks. The cream should be just think enough to hold its shape. Gently fold in more sugar or espresso to taste. (I add a total of about 1 Tablespoon, but it depends on preference and espresso brands)
- Assembly: Top the brownies with the mascarpone layer. Use an off-set spatula to create an even layer across the pan. Dust the top with cocoa powder to your liking. I find it takes up to 1/4 cup. Cut into 12-16 slices. Wipe the knife clean between each slice for cleaner edges.
Notes
1. Espresso powder: I initially tested this recipe using 1 tsp of espresso powder. However, I found that it didn’t pack enough of a coffee flavor against the rich chocolate of the brownie. However, feel free to use as much as you like. My tip is to start with 1 tsp, and taste test from there.
2. These brownies are best served the day after assembling the mascarpone cream layer. If you want to eat them the day of assembly, I recommend making the cream layer ahead of time. Tightly cover the cream layer with plastic wrap, pressing into the cream. You can store it in the fridge overnight and make the brownies the next day.
3. Tip: Try baking-specific cooking spay! This type of cooking oil adds flour which helps create a barrier between the parchment paper/pan and the bars.
4. If using salted butter; just add about 1/8 tsp of salt to the batter.

Leave a comment